How to Upgrade WordPress in 5 Steps (With Photos)
In 2024, keeping your WordPress site up-to-date is more crucial than ever. It’s not just about security (although that’s a big one). It’s also about optimizing for speed, snagging the latest features, and ensuring your site runs smoothly. But with busy schedules and competing priorities, how do you navigate a WordPress update in 2024?
Don’t worry, we’ve got you covered. Follow our simple step-by-step to make sure your website stays sharp and available 24/7.
Step-by-Step Guide
In my case, WordPress will be upgraded from Version 6.2.2 to Version 3. Note: Before upgrading your WordPress make sure you back up your existing installation.
Update WordPress via the admin panel
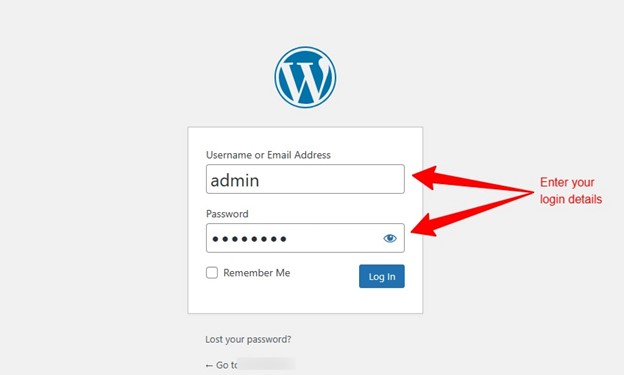
Step 1: Log into WordPress admin
Open your browser and go to www.yourwordpresswesite.com/wp-admin then sign in with your username and password.
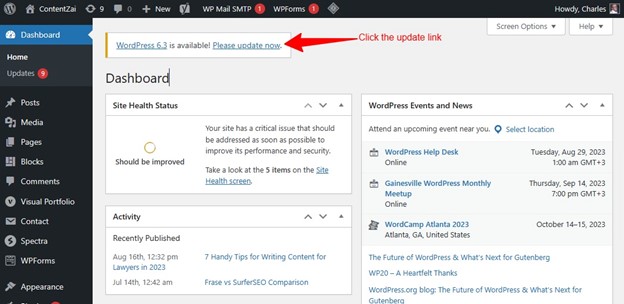
Step 2: Find and click the update link
If your WordPress version is outdated, you’ll see a notification to update it to the latest version. For our demo, it’s WordPress 6.3.
Note: Your website will be in maintenance mode while it is being updated, and will revert to normal once the update is complete.
If you’re unsure you’re running the latest WordPress version, click on the WordPress updates.
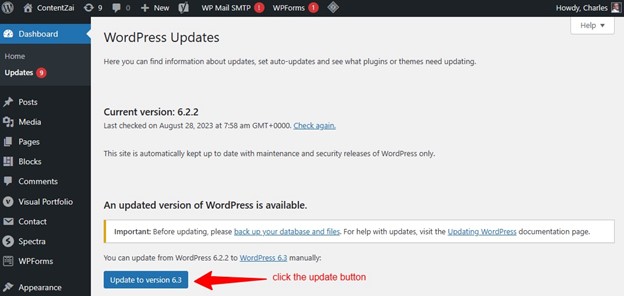
You will be able to see whether an updated version of WordPress is available. If it is, just lick the update button as shown above.
Wait for the update to complete. It will take a minute or two at most.
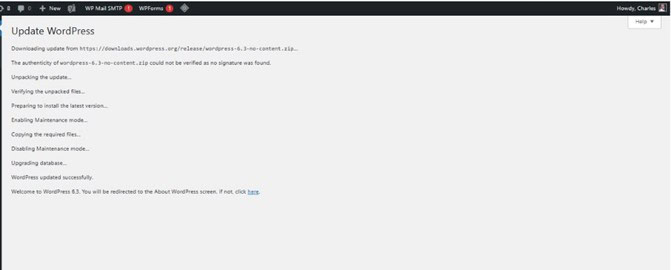
Important: Before updating, please back up your database and files.
Method Two: Upgrade WordPress via Softaculous Manager
If you have access to cPanel and know how to wiggle your way around, you can also update WordPress from your Softaculous Manager. Here is how to go about it.
Step 1: Launch the WordPress manager from your cPanel.
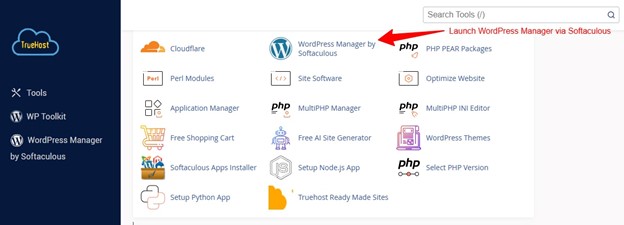
Step 2: Check for updates on the WordPress management area
You will see a button that say “updates available” to the right of the website you want to update.
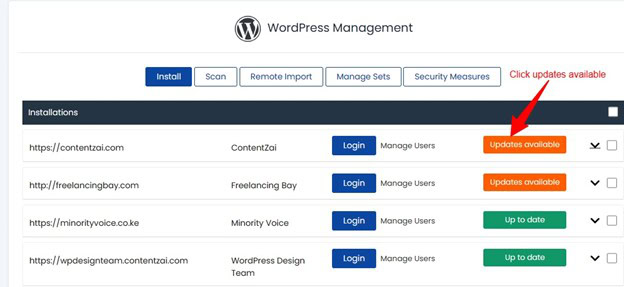
So go ahead and click on the orange upgrade button as shown above. A drop down menu will appear with the details of your WordPress site and the version.
3: Click on the blue upgrade now button
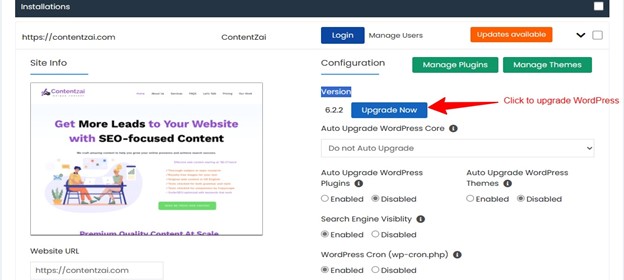
Don’t leave the page. Wait for the upgrade to complete. It could take between three to four minutes.
4. Next, Click the upgrade button at the bottom of the page
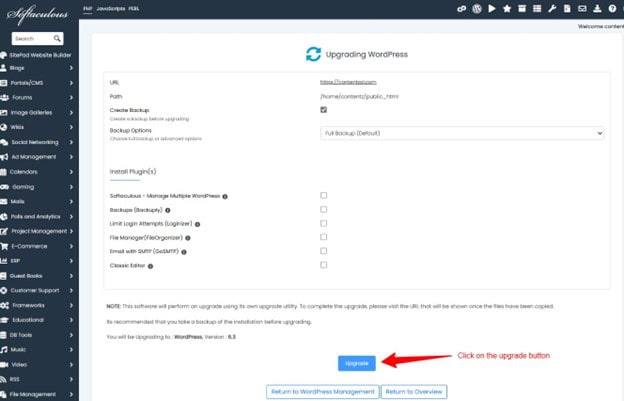
5. Wait for the upgrade to complete
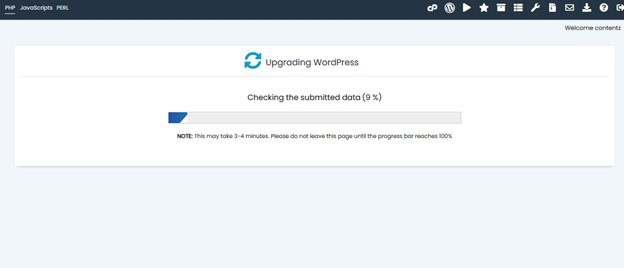
The WordPress upgrade will start immediately. You will see the progress bar. The process typically takes 3-4 minutes to complete.
Once your WordPress is updated to the latest version, you will see a message that the process is now complete.
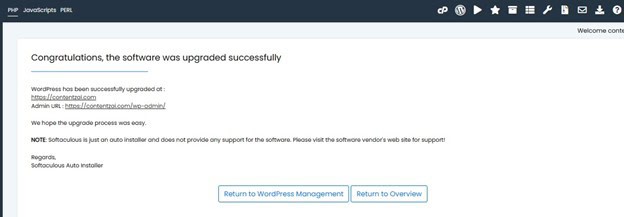
That’s all you need to upgrade your WordPress to the latest version.
