How to Install SSL Certificate on an Addon Domain in cPanel
Website security is a top priority today. If you are building a WordPress website, you want to ensure that it has a valid SSL certificate.
Adding an SSL Certificate to an Addon Domain
Follow these simple steps to add SSL to your WordPress website via cPanel.
Step 1: Log into your cPanel account from any web browser.
Enter your cPanel login and password to access your cPanel account.
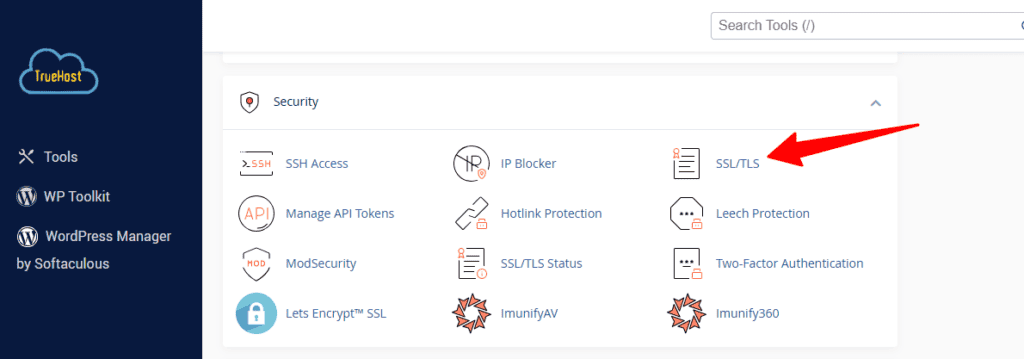
Step 2: Locate and click on SSL/TLS Manager (under the Security section) in the cPanel dashboard.
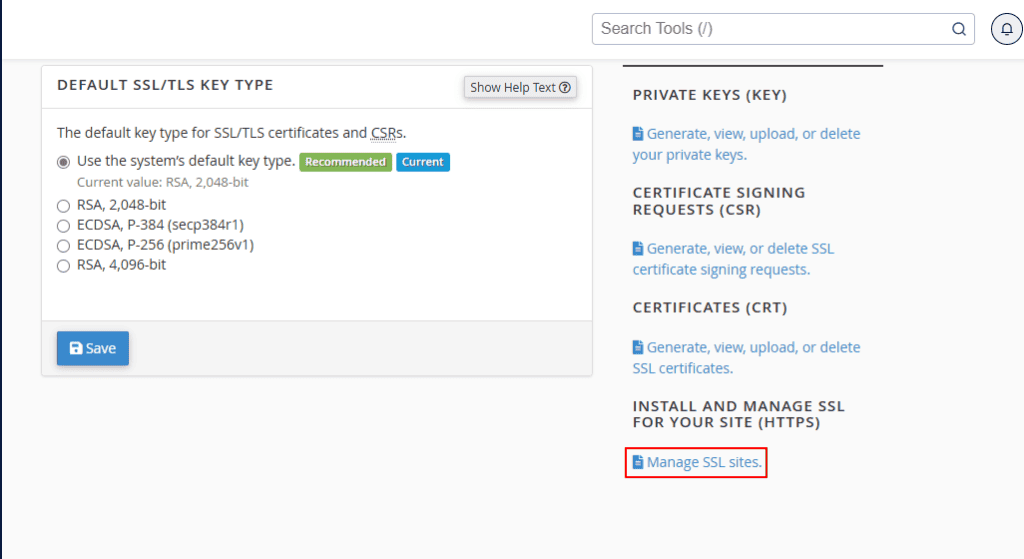
Step 3: Click “Manage SSL sites ” under “Install and Manage SSL For Your Site.”
Step 4: Select the addon domain from the drop-down list then click autofill.
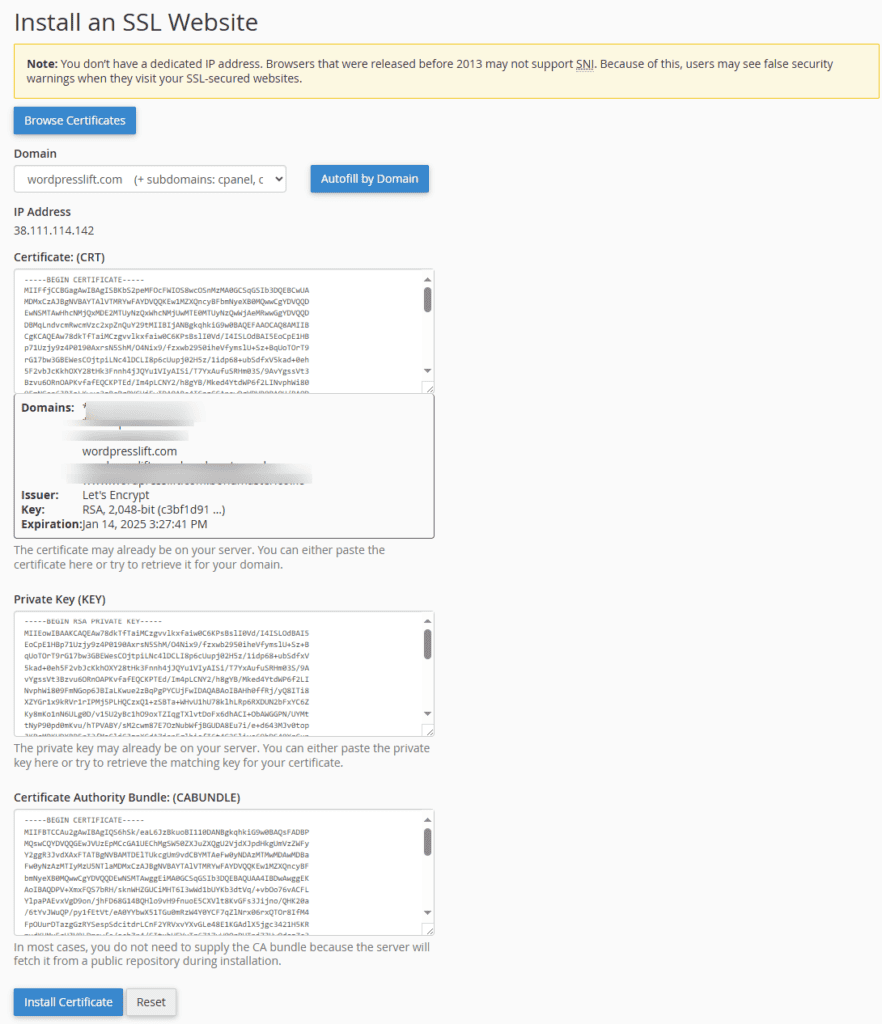
Step 5: Scroll down and click the install certificate button (blue) at the bottom.
Step 6: Wait for the SSL certificate to be installed.
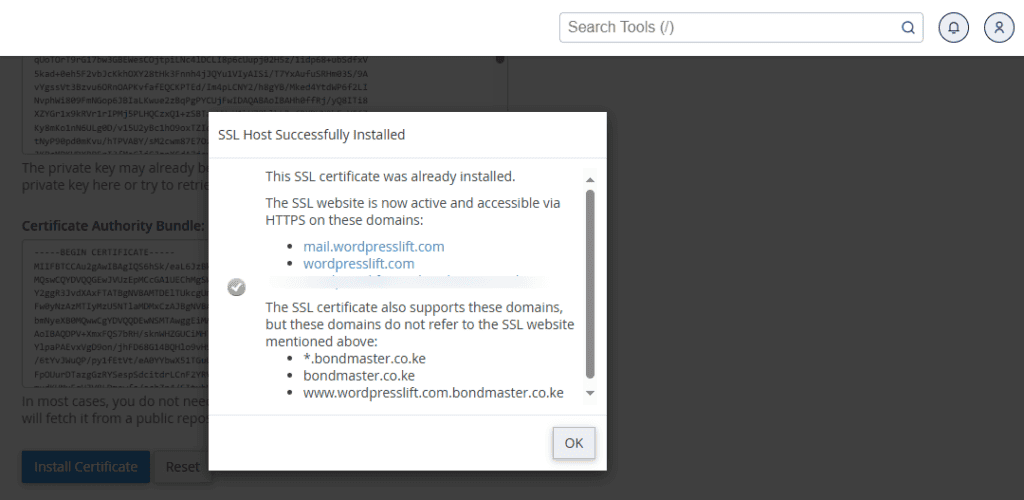
In a few seconds, a pop-up message will appear confirming the successful SSL installation. The site should now be accessible via https://. www.youdomain.com
Step 7: Verify the installation
You can check the installation using this tool.
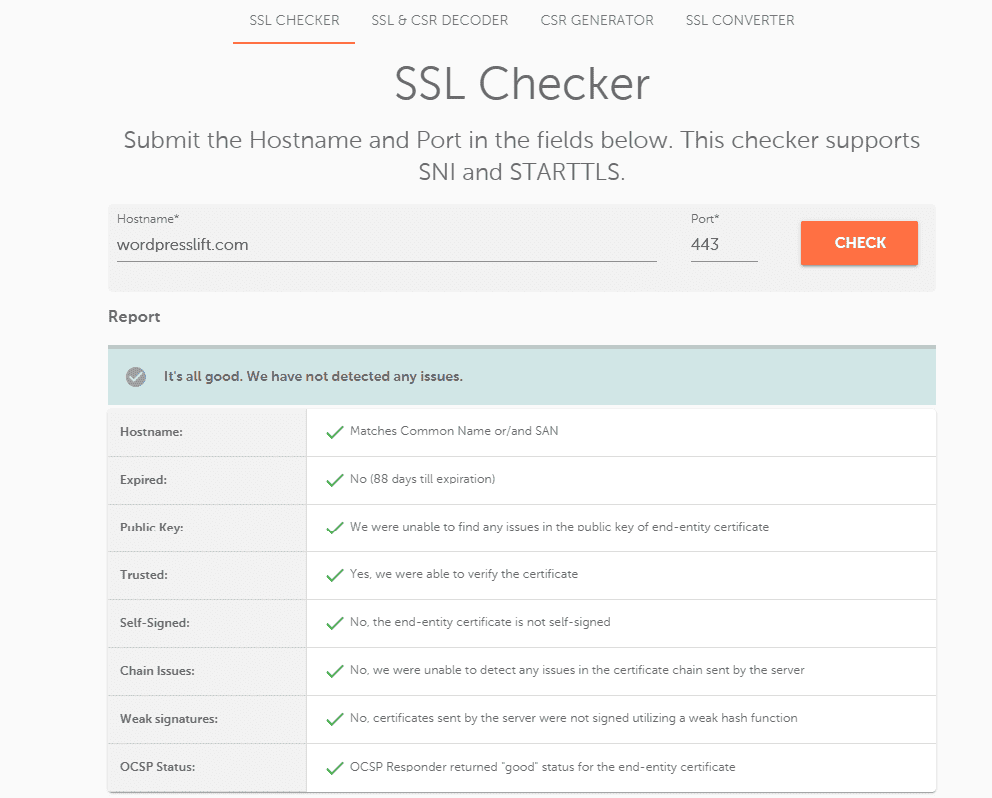
That’s all it takes to install an SSL certificate on WordPress via cPanel.
Have any questions? Need help? Get in touch with me.
